


Need a Mirror Like Shine? Here’s How to Use a Polishing Compound Stick
Ever wonder what's the secret to getting a flawless, mirror-like shine on your tools, metallic surfaces, or automotive parts?

You've come to the right place! LINE10 Tools presents a comprehensive guide to mastering the art of metal buffing and use of a Buffing compound stick and wheels to attain a dazzling, smooth finish on your projects. Our professional expertise guarantees top-notch results with ease.
What Exactly is a Buffing / Polishing Compound Stick? and how does it work?
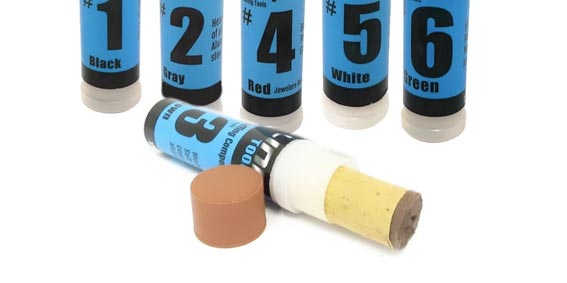
A buffing compound stick is a finely abrasive powder mixed with a binder agent or medium that resembles dry wax (similar to a candle stick), it is designed for removing surface blemishes, micro scratches and buffing a variety of surfaces, such as metal, plastic, and fiberglass.
It is applied to treat minor imperfections like micro surface scratches they work to smooth out the metal surface around the scratch instead of filling it up.
Please note that if the scratches can be felt with your fingernail, they are too deep for buffing and will not be removed. The only way to remove it is to wet sand the surface to remove the scratch. You can start with a course grit and go up to 2000 grit.
Once the scratch is removed, you can start applying the buffing compound to refine the surface to a mirror shine. The polishing compound is the best solution to creating a mirror-like finish on any surface especially Metallic surfaces.
Check out this video showcase of the buffing compounds and a demo of the process by buffing a gold club>>
How Do I Choose the Right Polishing Compound?
There are various types of polishing compounds. The key to finding out the appropriate way to use buffing and polishing compounds depends on the surface you are trying to polish and the level of shine you want.
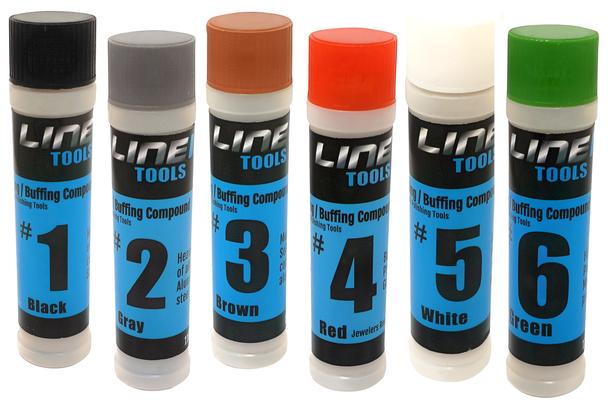
Here is an overview of the different grades of LINE10 Tools polishing / Buffing compounds and their uses:
#1 Black: Made for heavy-duty cleaning of hard metals, such as iron and stainless steel
#2 Grey: Ideal for medium cleaning, buffing, and scratch removal of hard metals such as iron, stainless steel, and aluminum alloys.
#3 Brown: Great for cleaning, buffing, and removing scratches from soft metals such as brass, copper, tin, and pewter.
#4 Red: Ideal for cleaning, buffing, and removing scratches from precious metals such as gold and silver, also known as jewelers' rouge.
#5 White: Ideal for polishing all metals to a high gloss finish, including hard and soft metals.
#6 Green: Ideal for polishing all types of metals to a mirror-like high gloss finish, including precious metals.
Check out LINE10 Tools 6 Pack Polishing Compound Kits
What Do I Need to Create a Shiny Polished Surface?
There are a couple of things that you need to create your perfect metallic surface:
1. The appropriate polishing compounds
2. A cleaning cloth
3. Buffing / Polishing Wheels attached to a buffing machine or power tool, such as a drill, rotary tool, etc.
Check out this blog post for a guide on how to Turn your bench grinder into a lean mean buffing machine>>

Here's How to Use a Polishing Compound in Five Easy Steps:

Step 1: Prepare the surface
Before you Begin the buffing process you need to remove any excessive rust, oxidization or contamination from the surface by a good heavy duty scrubbing
Then you need to evaluate the scratches of the surface, if you can feel the scratches with your fingernail, they are too deep for buffing and will not be removed. The only way to remove deep scratches is by wet sanding the surface to remove the scratch. You can start with a course grit and go up to 2000 grit.
Step 2: Identify the Material of The Surface
The tricky part of using the correct compound is understanding why you are using it. As stated earlier, different colors represent various grits and are appropriate for a variety of surfaces. Some grades are used for softer metals, and others are for harder metals. Furthermore, some compounds are slightly coarser, making them better for scratch removals, such as #2 Grey for hard metals or #3 Brown for softer metals; Other compounds are used for the final polishing steps, such as #5 white or #6 Green. Refer to the chart on the product page for a quick reference.
Step 3: Apply The Compound Onto the Revolving Buffing Wheel
Once you find the suitable compound, spin the buffing and polishing using a power tool such as a bench grinder or drill and gently rubbing the polishing compound stick against the wheel from side to side. If you push too hard, you will end up with the compound applied excessively and unevenly on the wheel.
Apply the compound until you see a light layer of the compound onto all ends of the wheel. You only need a little bit of compound to polish your surface.
Once you are done, use a scrap metal edge to eliminate clumps and even out the buffing compound film.
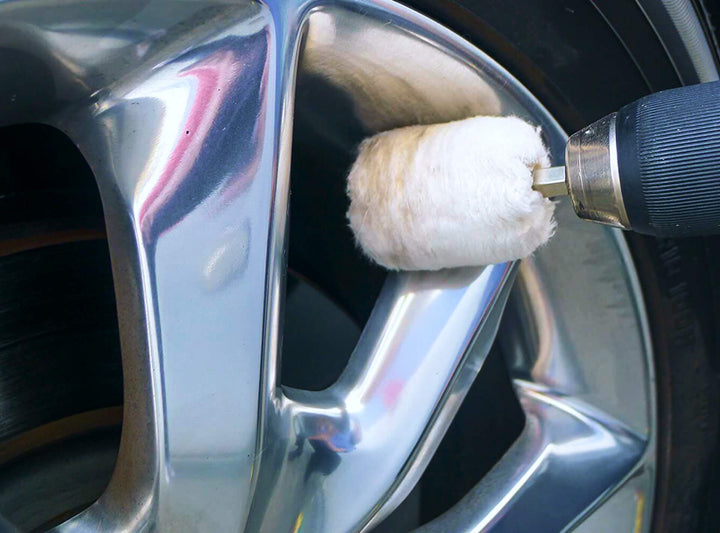
Step 4: Hold the Item against the Revolving Buffing Wheel (or Vice Versa)
You are now ready to start the buffing process. Hold the item against the compound-covered wheel and let the compound work through the surface. Repeat step 3 and re-apply the polishing compound again often. Apply the compound until you cover up the entire surface with a light layer of compound and reapply frequently.
Step 5: Wipe Up the Residue With a Cloth
After polishing, a layer of residue compound will be left on the surface. Grab a cloth with warm water and soap, wipe the residue with the moist cloth. Once it is clean, you will finally see the result of your polishing efforts, Good Job!
Keep Your Surface Reflective and Fresh Looking
Now that you know the secrets to create a mirror-like finish, you can make the roughest metals look shiny and brand-new. From a rusty car in the ’70s to a wrench from WW2, you can make them look like they were manufactured yesterday. The polishing compound is an everyday staple for metal workers and fabricators. The best part of the polishing compound is not just having your surface look fresh, but it helps preserve any surface from oxidation and scratches. With the right tools, YOU can get started on any restoration project and make your metals look shiny and brand new.
Get Started With Our Selection of Buffing and Polishing Tools


Thank you for a very informative article. I want to polish aluminum rims on a custom trike but no one explained how to properly use the compounds with the wheels.
Leave a comment